
Page 115 - Friedman Archives
P. 115
Setting Things Up – Wi-Fi Download 115
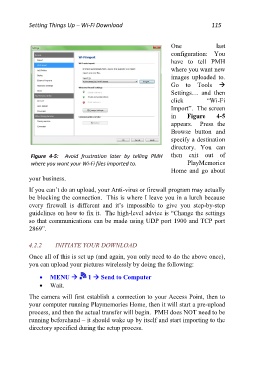
One last
configuration: You
have to tell PMH
where you want new
images uploaded to.
Go to Tools
Settings… and then
click “Wi-Fi
Import”. The screen
in Figure 4-5
appears. Press the
Browse button and
specify a destination
directory. You can
Figure 4-5: Avoid frustration later by telling PMH then exit out of
where you want your Wi-Fi files imported to. PlayMemories
Home and go about
your business.
If you can’t do an upload, your Anti-virus or firewall program may actually
be blocking the connection. This is where I leave you in a lurch because
every firewall is different and it’s impossible to give you step-by-step
guidelines on how to fix it. The high-level advice is “Change the settings
so that communications can be made using UDP port 1900 and TCP port
2869”.
4.2.2 INITIATE YOUR DOWNLOAD
Once all of this is set up (and again, you only need to do the above once),
you can upload your pictures wirelessly by doing the following:
MENU 1 Send to Computer
Wait.
The camera will first establish a connection to your Access Point, then to
your computer running Playmemories Home, then it will start a pre-upload
process, and then the actual transfer will begin. PMH does NOT need to be
running beforehand – it should wake up by itself and start importing to the
directory specified during the setup process.