
Page 340 - Friedman Archives
P. 340
340 The “Playback” Menu Settings
purists.) In fact, there is an HD-optimized thumbnail embedded within
every .jpg (RAW files too) just for this purpose.
I’ve found that the SlideShow feature
comes in especially handy when I’m
taking studio portraits of couples or
families. It allows a large group to
review the shots taken in small batches.
Once the subjects get the “instant
feedback” through the magic of digital,
the next batch of pictures in the studio
almost always result in more relaxed,
spirited portraits. And it’s faster than
shooting with Wi-Fi (Section 4.2).
To have the camera give you a “slide
show” (either through the LCD display
or while hooked up to an HDTV):
1. Make sure that MENU 1
View Mode is set to either Date
View or Folder View (Still).
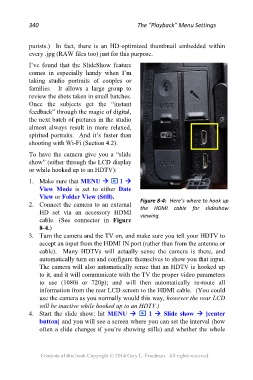
2. Connect the camera to an external Figure 8-4: Here’s where to hook up
HD set via an accessory HDMI the HDMI cable for slideshow
cable. (See connector in Figure viewing.
8-4.)
3. Turn the camera and the TV on, and make sure you tell your HDTV to
accept an input from the HDMI IN port (rather than from the antenna or
cable). Many HDTVs will actually sense the camera is there, and
automatically turn on and configure themselves to show you that input.
The camera will also automatically sense that an HDTV is hooked up
to it, and it will communicate with the TV the proper video parameters
to use (1080i or 720p); and will then automatically re-route all
information from the rear LCD screen to the HDMI cable. (You could
use the camera as you normally would this way, however the rear LCD
will be inactive while hooked up to an HDTV.)
4. Start the slide show: hit MENU 1 Slide show [center
button] and you will see a screen where you can set the interval (how
often a slide changes if you’re showing stills) and whether the whole
Contents of this book Copyright © 2014 Gary L. Friedman. All rights reserved.