
Page 360 - Friedman Archives
P. 360
360 The “Setup” (Toolbox Icon) Menu Settings
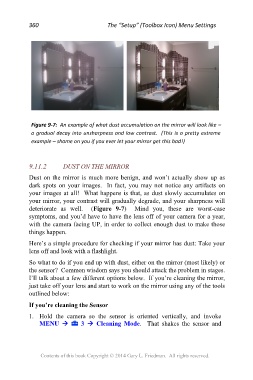
Figure 9-7: An example of what dust accumulation on the mirror will look like –
a gradual decay into unsharpness and low contrast. (This is a pretty extreme
example – shame on you if you ever let your mirror get this bad!)
9.11.2 DUST ON THE MIRROR
Dust on the mirror is much more benign, and won’t actually show up as
dark spots on your images. In fact, you may not notice any artifacts on
your images at all! What happens is that, as dust slowly accumulates on
your mirror, your contrast will gradually degrade, and your sharpness will
deteriorate as well. (Figure 9-7) Mind you, these are worst-case
symptoms, and you’d have to have the lens off of your camera for a year,
with the camera facing UP, in order to collect enough dust to make those
things happen.
Here’s a simple procedure for checking if your mirror has dust: Take your
lens off and look with a flashlight.
So what to do if you end up with dust, either on the mirror (most likely) or
the sensor? Common wisdom says you should attack the problem in stages.
I’ll talk about a few different options below. If you’re cleaning the mirror,
just take off your lens and start to work on the mirror using any of the tools
outlined below:
If you’re cleaning the Sensor
1. Hold the camera so the sensor is oriented vertically, and invoke
MENU 3 Cleaning Mode. That shakes the sensor and
Contents of this book Copyright © 2014 Gary L. Friedman. All rights reserved.