
Page 86 - 2019 SHOP MANUAL CRF1000/A/D
P. 86
dummyheadmmyhead
du
MAINTENANCE
Throttle grip freeplay can be adjusted at either end of
the throttle cable. [2] [3] [1]
Minor adjustments is made with the upper adjuster.
Release the dust cover [1].
Adjust the freeplay by loosening the lock nut [2] and
turning the adjuster [3].
Tighten the lock nut while holding the adjuster to the
specified torque.
TORQUE:3.8 N·m (0.4 kgf·m, 2.8 lbf·ft)
Reposition the dust cover properly on the adjuster.
Recheck the throttle operation.
Major adjustments is made with the lower adjuster on
the throttle body.
Lift and support the fuel tank using a suitable support
(page 3-3).
Adjust the freeplay by loosening the lock nut [1] and [2]
turning the adjuster [2].
After adjustment, tighten the lock nut to the specified
torque.
TORQUE:8.5 N·m (0.9 kgf·m, 6.3 lbf·ft)
Recheck the throttle operation.
Install the fuel tank (page 3-3). [1]
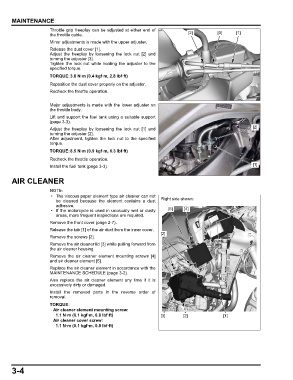
AIR CLEANER
• The viscous paper element type air cleaner can not
be cleaned because the element contains a dust Right side shown:
adhesive.
• If the motorcycle is used in unusually wet or dusty [5] [4]
areas, more frequent inspections are required.
Remove the front cover (page 2-7).
Release the tab [1] of the air duct from the inner cover.
[2]
Remove the screws [2].
Remove the air cleaner lid [3] while pulling forward from
the air cleaner housing.
Remove the air cleaner element mounting screws [4]
and air cleaner element [5].
Replace the air cleaner element in accordance with the
MAINTENANCE SCHEDULE (page 3-2).
Also replace the air cleaner element any time if it is
excessively dirty or damaged.
Install the removed parts in the reverse order of
removal.
TORQUE:
Air cleaner element mounting screw:
1.1 N·m (0.1 kgf·m, 0.8 lbf·ft) [3] [2] [1]
Air cleaner cover screw:
1.1 N·m (0.1 kgf·m, 0.8 lbf·ft)
3-4